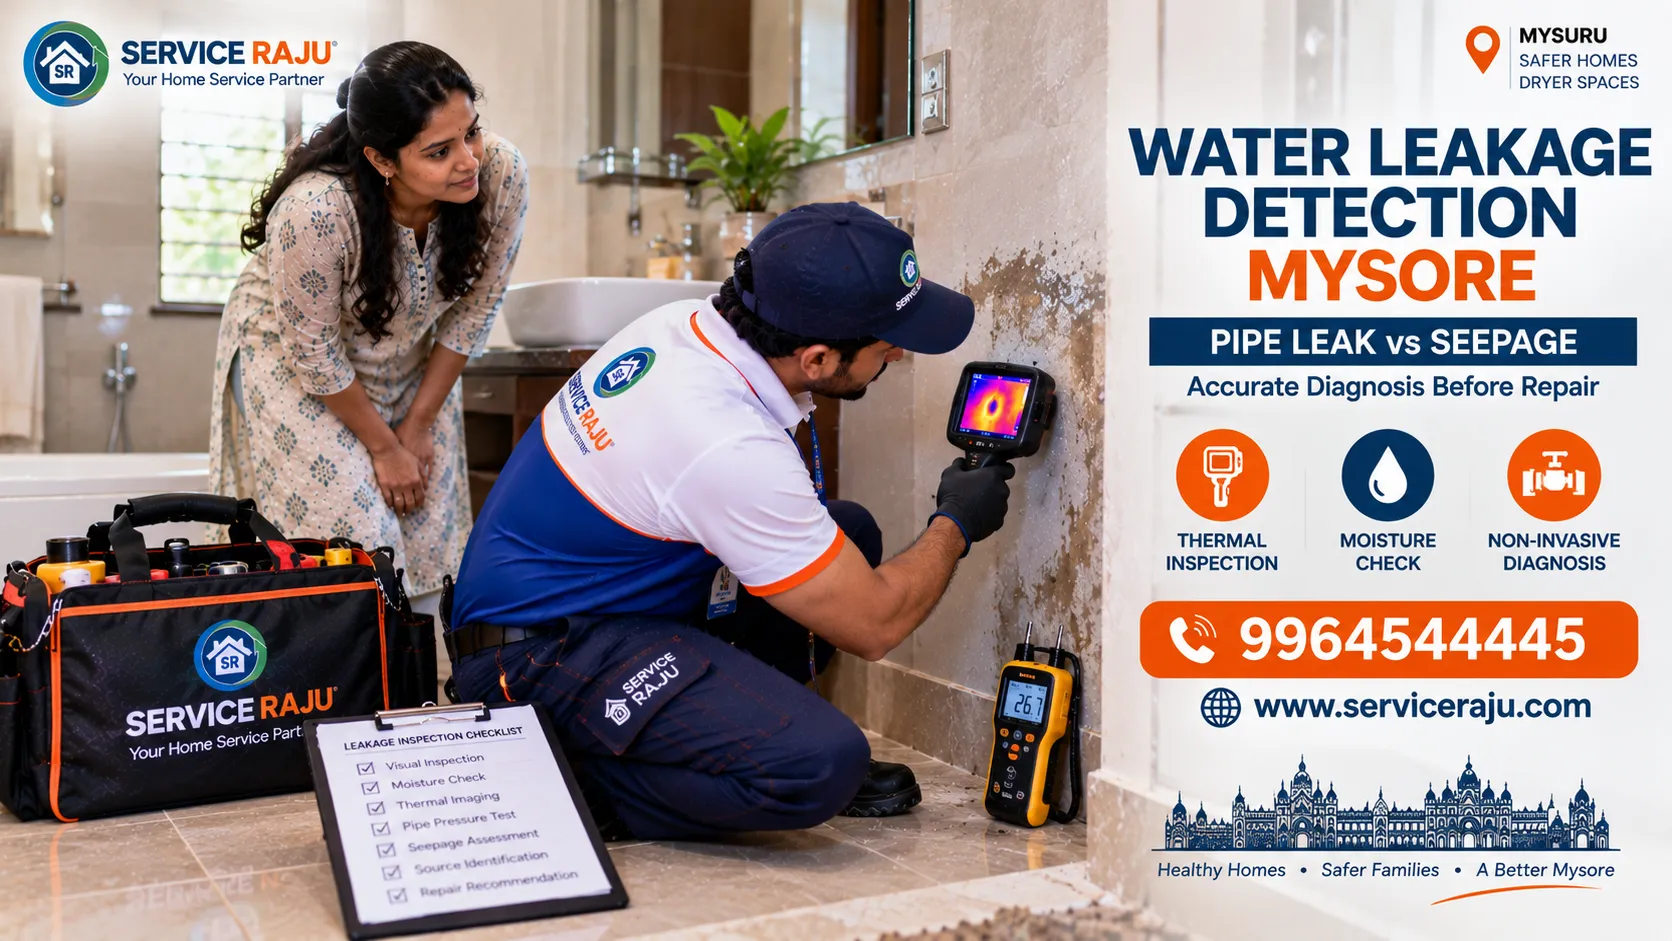
Water Leakage Detection Mysore: 10 Tests to Tell Pipe Leak vs Seepage Before Repair
Water Leakage Detection Mysore becomes much more useful when the first question is not simply “Where is the wet patch?” but “What is causing the moisture?” A damp wall can result from a concealed plumbing leak, bathroom seepage, terrace or external-wall water ingress, condensation, drainage problems or another building-related source.
That distinction matters because the repair can be completely different. A concealed pipe leak may require plumbing investigation, while seepage through a bathroom floor or terrace may require waterproofing assessment. Breaking tiles or opening a wall before identifying the likely source can turn a diagnostic problem into an unnecessary repair project.
This guide explains 10 practical diagnostic checks that can help distinguish a pipe leak from seepage before major repair work begins.
Quick Answer: Is It a Pipe Leak or Water Seepage?
Before starting repair work, look at the pattern:
| Observation | What It May Suggest |
|---|---|
| Water meter continues moving when all taps are closed | Possible pressurized plumbing leak |
| Dampness appears only after bathroom use | Possible bathroom plumbing or waterproofing issue |
| Damp patch increases during rainfall | Possible external or terrace water ingress |
| Warm or unusual thermal pattern near hot-water line | Possible hot-water pipe issue |
| Moisture appears below another bathroom | Possible concealed plumbing or waterproofing problem |
| Moisture remains even when water use stops | Needs further moisture-source investigation |
These observations are clues, not final diagnoses. A professional inspection should combine the visible symptoms with appropriate measurements and testing.
Table of Contents
- Pipe Leak vs Seepage: Why the Difference Matters
- 10 Tests and Checks Before Repair
- How Thermal Imaging Helps Find Hidden Moisture
- When Pressure Testing Makes Sense
- Why a Moisture Meter Matters
- When Should You Break a Wall or Floor?
- What a Professional Leakage Report Should Show
- Water Leakage Detection Service in Mysore
- FAQs
- Final Takeaway
Pipe Leak vs Seepage: Why the Difference Matters
A visible damp patch tells you where moisture has appeared, but it does not necessarily identify where the water entered the building.
Water can travel through masonry, concrete, tile bedding and other building materials before becoming visible. As a result, the wet patch on a ceiling or wall can sometimes be away from the actual source.
That is why professional hidden water leak detection Mysore should focus on finding the source and understanding the path of moisture rather than repairing only the visible stain.
The distinction is especially important in bathrooms:
- A pipe may be leaking inside a wall.
- A drain connection may be leaking.
- Water may be escaping through a shower or fixture connection.
- Failed waterproofing may allow water through the floor or wall.
- Grout or sealant problems may permit localized water entry.
Each situation can require a different repair approach.
10 Tests and Checks Before Repair
1. Check the Water Meter When Everything Is Switched Off
One useful preliminary check is to stop normal water use and observe the water meter, where the property has an accessible meter and the system allows a meaningful reading.
Make sure:
- Taps are closed.
- Toilets are not refilling.
- Washing machines are not taking water.
- Dishwashers and other water-using appliances are not operating.
- Other known water-consuming equipment is inactive.
If the meter continues showing consumption, a concealed supply-side leak becomes one possible explanation. However, the plumbing arrangement should be considered before interpreting the result.
2. Compare the Timing of the Dampness
Ask when the dampness becomes worse.
For example:
- Does it increase immediately after a shower?
- Does it appear after using a wash basin?
- Does it become worse after flushing?
- Does it increase when a washing machine runs?
- Does it become worse only after rainfall?
- Does it remain unchanged regardless of water use?
The timing can provide an important clue about the possible source.
3. Check Whether the Moisture Is Connected to a Bathroom
When a ceiling or wall below a bathroom becomes damp, inspect the bathroom above before assuming the ceiling itself is the source.
Look at:
- Shower areas
- Floor drains
- Toilet connections
- Wash-basin plumbing
- Health-faucet connections
- Water-supply lines
- Floor and wall junctions
- Old sealant and grout
If the moisture appears specifically after bathroom use, this timing can help narrow the investigation.
4. Check Whether the Problem Changes During Rain
If the damp patch becomes noticeably worse after rainfall, investigate external water entry before immediately opening internal plumbing.
Possible areas include:
- Terrace surfaces
- Roof drainage
- External walls
- Window edges
- Balconies
- Cracks in external surfaces
- Construction joints
A plumbing leak and rainwater seepage can create similar-looking stains, so timing and external inspection are important.
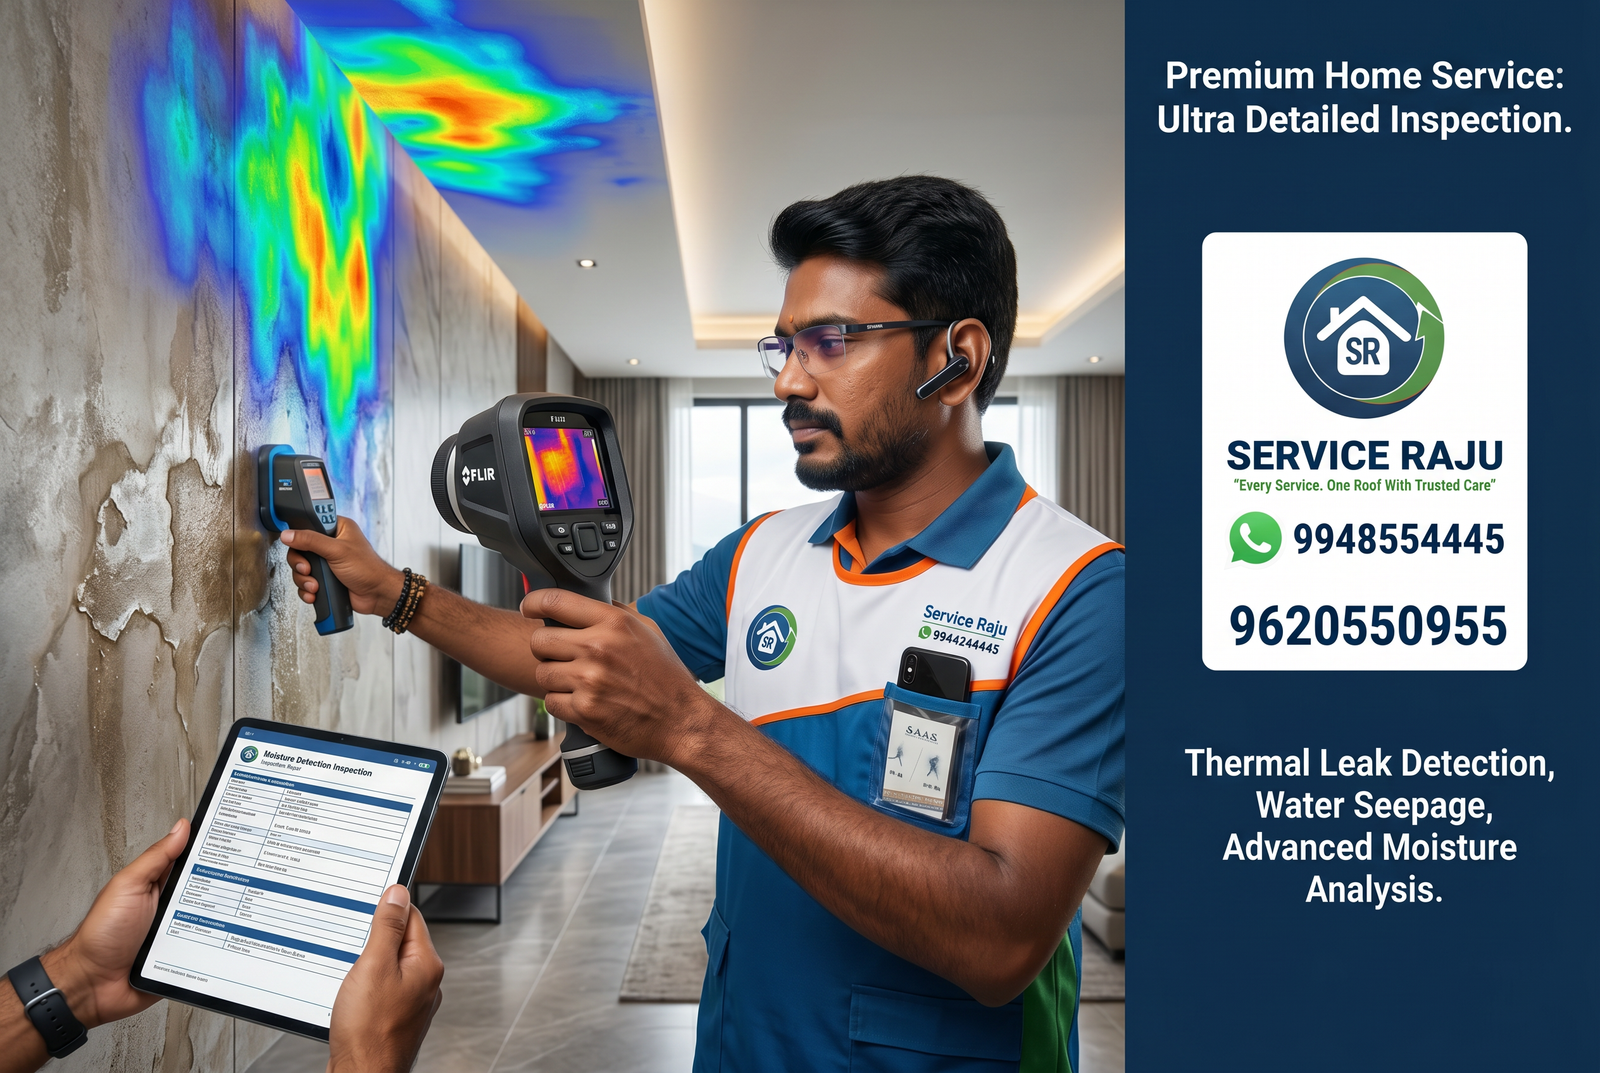
5. Use Thermal Imaging to Locate Temperature Anomalies
Thermal imaging can help identify areas that deserve closer investigation when hidden moisture is suspected.
A thermal camera does not directly “see” water behind a wall. Instead, it detects surface temperature differences and patterns that may be associated with moisture or other building conditions.
FLIR's building-diagnostics guidance describes thermal imaging as a tool for locating potential moisture intrusion and recommends using moisture measurement to investigate and verify suspected wet areas.
Thermal imaging can therefore be especially useful for:
- Walls
- Ceilings
- Bathroom surfaces
- Floors
- Areas around concealed plumbing
- Hot-water pipe routes
The important point is that a thermal image should be interpreted by a trained technician and verified where appropriate.
6. Confirm Suspected Moisture With a Moisture Meter
A thermal anomaly is not automatically a water leak.
Temperature differences can have multiple causes. That is why suspected moisture should be checked with appropriate moisture measurement where possible.
FLIR specifically recommends using a moisture meter to confirm what thermal imaging has identified as a possible moisture-related area. Its current building-inspection systems combine thermal imaging with moisture measurement for this reason.
This creates a stronger diagnostic sequence:
Thermal scan → identify suspicious zone → moisture verification → determine likely source.
7. Check the Plumbing Line When a Concealed Pipe Leak Is Suspected
If the evidence points toward a pressurized water line inside the wall or floor, the plumbing system may need a more specific diagnostic test.
The technician should first establish:
- Which line supplies the affected area
- Whether the line is accessible
- Whether other fixtures share the same supply
- Whether visible fittings show leakage
- Whether the plumbing system can be isolated for testing
The testing method should match the pipe type, installation and condition of the system. Older GI, CPVC and other pipe systems should not automatically be treated as identical.
8. Consider Pressure Testing When Appropriate
Where a concealed plumbing leak is suspected, pressure testing can help determine whether an isolated water line is holding pressure as expected.
Pressure testing can be useful when:
- No visible leak is found.
- The line is concealed.
- There is unexplained water loss.
- Moisture evidence suggests plumbing leakage.
- A newly installed line requires verification.
However, the technician should select a test pressure and procedure appropriate for the pipe material, system design and condition. Older or fragile plumbing should not be exposed to arbitrary test pressures simply because a high-pressure pump is available.
9. Compare the Moisture Pattern With the Plumbing Layout
After thermal and moisture checks, compare the affected zone with the actual location of pipes and fixtures.
Ask:
- Does the thermal anomaly follow a pipe route?
- Is the moisture concentrated below a bathroom fixture?
- Does the affected area correspond with a supply line?
- Does it align with a drain or waste line?
- Is the moisture outside the expected plumbing route?
This step helps prevent a common mistake: assuming that every damp wall is a concealed pipe leak.
10. Decide the Repair Based on Evidence, Not Guesswork
Once inspection and testing are complete, the technician should explain the likely source and recommended repair.
| Likely Finding | Possible Next Step |
|---|---|
| Pressurized pipe leak | Targeted plumbing repair |
| Bathroom waterproofing failure | Waterproofing assessment and repair |
| Drain or waste connection leak | Drainage/plumbing repair |
| External wall seepage | External sealing/waterproofing assessment |
| Terrace water ingress | Terrace drainage/waterproofing assessment |
| Moisture without confirmed plumbing source | Further moisture investigation |
The objective is not simply to find a damp patch. It is to identify the most probable source before committing to destructive repair work.
How Thermal Imaging Helps Find Hidden Moisture
Thermal imaging is particularly useful when the source cannot be seen directly.
When moisture changes the thermal behaviour of a building surface, a thermal camera may show a temperature pattern that differs from surrounding dry material. Depending on the conditions, moisture may appear as a cooler or otherwise distinct thermal region.
FLIR explains that thermal imaging can help locate hidden moisture and water intrusion, but also emphasizes that thermal patterns require verification because temperature differences can have causes other than moisture.
For professional inspection, a better workflow is therefore:
- Visual inspection
- Thermal scanning
- Moisture verification
- Plumbing or pressure testing where justified
- Source assessment
- Targeted repair recommendation
- Post-repair verification where required
When Pressure Testing Makes Sense
Pressure testing is not required for every water-leakage case.
It becomes more relevant when the suspected source is a concealed pressurized water-supply line and visible inspection cannot identify the fault.
For example, pressure testing may help investigate:
- Concealed bathroom supply lines
- Kitchen water-supply lines
- Hot-water lines
- New plumbing installations
- Suspected concealed pipe leakage
For older buildings, the technician should first understand the pipe material and condition before selecting the testing procedure.
Why a Moisture Meter Matters
Moisture measurement provides an additional piece of evidence when investigating a suspicious thermal pattern.
Modern building-diagnostic equipment combines thermal imaging with moisture measurement to help locate and verify moisture-related problems.
This is valuable because:
- A thermal camera identifies areas that deserve attention.
- A moisture meter helps verify moisture conditions.
- Plumbing tests help assess concealed supply lines when appropriate.
- Visual inspection helps identify building and waterproofing causes.
No single measurement should automatically be treated as the complete diagnosis.
When Should You Break a Wall or Floor?
Breaking tiles, plaster or masonry should ideally happen after the suspected source has been narrowed down.
A controlled opening may become necessary when:
- A concealed pipe location has been narrowed to a specific area.
- A damaged pipe or joint requires physical access.
- A waterproofing failure needs structural access.
- Non-invasive testing cannot establish the source with sufficient confidence.
- Repair work itself requires an opening.
The purpose of non-invasive detection is not to promise that a wall will never need to be opened. The goal is to reduce unnecessary breaking and make any required opening more targeted.
FLIR's building-diagnostics guidance similarly describes thermal imaging and moisture measurement as ways to locate and verify affected areas while reducing unnecessary demolition.
What a Professional Leakage Report Should Show
When a leakage investigation is performed with diagnostic equipment, the customer benefits from a clear record of what was actually found.
A useful report can include:
- Inspection date
- Customer and property details
- Areas inspected
- Visible observations
- Thermal images where used
- Moisture readings where applicable
- Pressure-test observations where performed
- Probable source analysis
- Recommended corrective action
- Limitations of the inspection
- Conclusion
Thermal-imaging systems used in professional building diagnostics can also support documentation and reporting of findings.
Water Leakage Detection Service in Mysore
Service Raju provides water leakage detection and diagnostic services in Mysuru for homes, apartments and commercial properties.
Depending on the suspected source, an inspection may include:
- Manual leakage inspection
- Hidden water leakage detection
- Wall leakage detection
- Bathroom leakage detection
- Ceiling leakage detection
- Moisture detection
- Thermal imaging inspection
- Non-invasive leakage detection
- Plumbing diagnosis
- Pressure assessment where appropriate
The appropriate combination of tools depends on the property, pipe type, visible symptoms and suspected source.
Why Start With Detection?
Because a damp patch is not necessarily the source.
Service Raju can help investigate whether the problem is more consistent with:
- Concealed plumbing leakage
- Bathroom leakage
- Ceiling leakage
- External wall seepage
- Terrace water ingress
- Moisture-related building problems
Inspection first. Repair after the source is understood.
Call / WhatsApp: 9964544445
Website: www.serviceraju.com
Service Raju — Your Home Service Partner
FAQs About Water Leakage Detection in Mysore
How can I tell if I have a hidden pipe leak?
Look for unexplained water consumption, a meter that continues moving when water use has stopped, recurring dampness, unexplained stains or moisture patterns. These are clues, not proof. Professional inspection can determine whether a concealed pipe is a likely source.
How can I tell the difference between a pipe leak and waterproofing failure?
Look at the timing and location of the moisture. Dampness connected closely with fixture use can suggest a plumbing-related source, while moisture that increases after rainfall may point toward external water ingress. Thermal, moisture and plumbing tests can help narrow the source.
Can thermal imaging see water inside a wall?
Not directly. A thermal camera detects temperature differences and patterns that may indicate moisture. Those findings should be interpreted in context and verified with appropriate moisture measurements where needed.
Is thermal imaging enough to confirm a leak?
Not always. FLIR specifically notes that thermal patterns can have causes other than moisture and recommends moisture measurement to confirm suspected wet areas.
When is pressure testing useful?
Pressure testing can be useful when a concealed pressurized water line is suspected and the system can be safely isolated and tested. The correct procedure depends on the pipe material, installation and condition.
Do all leaks require breaking the wall?
No. Non-invasive inspection can sometimes narrow the suspected area before opening a wall or floor. However, physical access may still be required for some repairs or when non-invasive evidence is insufficient.
Why is the damp patch sometimes far away from the actual leak?
Water can travel through building materials before becoming visible, so the location of a stain does not necessarily equal the location of the leak. This is one reason source-level inspection is valuable.
Can Service Raju inspect bathroom leakage without immediately breaking tiles?
Yes. Depending on the case, the inspection can begin with visual assessment, moisture investigation and thermal imaging or other suitable diagnostic methods before deciding whether physical access is necessary.
Does Service Raju provide a leakage inspection report?
For diagnostic inspections where reporting is required, the findings can be documented with the observations, evidence and recommended corrective action appropriate to the inspection.
Final Takeaway
Water Leakage Detection Mysore should begin with diagnosis, not demolition.
Before breaking walls or replacing bathroom tiles, investigate the evidence:
Observe → Check the water system → Map the moisture → Thermal scan → Verify moisture → Pressure-test where appropriate → Identify the likely source → Repair.
Thermal imaging can be a powerful non-invasive tool, but it works best as part of a broader diagnostic process. FLIR's current building-inspection guidance likewise combines thermal imaging with moisture measurement and documentation rather than treating a thermal image alone as a complete diagnosis.
When you know whether the problem is a concealed pipe leak, bathroom seepage, terrace ingress or another moisture source, you can plan a more targeted repair instead of breaking first and searching later.
Seeing unexplained dampness, seepage or a possible hidden pipe leak in Mysore?
Book a Water Leakage Detection inspection with Service Raju.
Call / WhatsApp: 9964544445
Website: www.serviceraju.com
 AC Repair
.webp) Ant Control Service
Ant Control Service
 Basin & Sink Services
.webp) Bath & Shower Services
Bath & Shower Services
.webp) Bath Fittings & Mirrors
Bath Fittings & Mirrors
 Bathroom Cleaning Service
 Bathroom Renovation Services
 Bed Bug Control Services
 Bedroom Painting
 Book a Carpenter Consultation
 Book Electrical Consulting
.webp) Cabinet Painting & Wood Refinishing
Cabinet Painting & Wood Refinishing
 Chimney Cleaning
 Civil Masonry Work
 Clean-Up Services
.webp) Clothes Hanger Installation
Clothes Hanger Installation
 Cockroach Control Services
---mysore-mysore-standard-300x200.webp) Commercial Cleaning
Commercial Cleaning
 Commercial Pest Control AMC Service
 Cupboard & Drawer Services
 Decorative Wall Panels
 Deep Sanitisation Service
 Detan & Bleach
 Door, Grill & Cabinet Painting Service
.webp) Doorbell & security
Doorbell & security
 Drain Blockage Clearing
 Electrical Appliance Services
 Electrical Wiring Services
 Empty Home Deep Cleaning
.webp) Fabrication
Fabrication
 Facials
.webp) Fan Installation & Repair
Fan Installation & Repair
 Full Home Cleaning Service
 Full Home Renovation
 Furniture Repair Service
 Gas Stove & Hob Repair
.webp) General Pest Control Services
General Pest Control Services
 General Plumbing & Consultation
 Geyser Repair
 Glass Cleaning
 Head Massage
.webp) Honeybee & Wasp-Services
Honeybee & Wasp-Services
 Kitchen & Bathroom Painting Service
 Kitchen Cleaning
 Kitchen Fittings
.webp) Kitchen Renovation
Kitchen Renovation
.webp) Laptop/Desktop service
Laptop/Desktop service
 Leak Detection and Repair
 LED TV Repair
 Living and Dining Room Painting
 Makeup, Saree & Styling
 Manicure & Pedicure
 MCB,Meter & Fuse Services
 Microwave Repair
 Mosquito Pest Control Service
 Multi-Room Painting Service
 Painting Consultation
 Quick Mini Cleaning Services
 Refrigerator Repair
 RO Water Purifier
.webp) Rodent Control Services (Rat & Mice Treatment)
Rodent Control Services (Rat & Mice Treatment)
.webp) Rooms Cleaning
Rooms Cleaning
 Shelves & Decor
 Sofa, Carpet & Mattress Cleaning
 Solar Water Heater Service
 Sump & Tank Cleaning
 Switch & Socket Services
 Tap & Mixer Service
.webp) Termite-Control-Services
Termite-Control-Services
 Threading & Face Wax
.webp) Tile & Granite Installation & Polishing
Tile & Granite Installation & Polishing
 Toilet & Commode Services
.webp) UPS and Inverter Repair Services
UPS and Inverter Repair Services
.webp) Wall Painting Service
Wall Painting Service
 Washing Machine Repair
 Water Level Controllers
 Water Tank and Pump Repair
 Waterproofing
 Waterproofing Services
 Waxing
 Window & Curtain Services
 Wooden Door Services