Wall Paint Bubbling After Rain? 7 Causes and the Right Repair
1. Wall Paint Bubbling After Rain? 7 Causes and the Right Repair
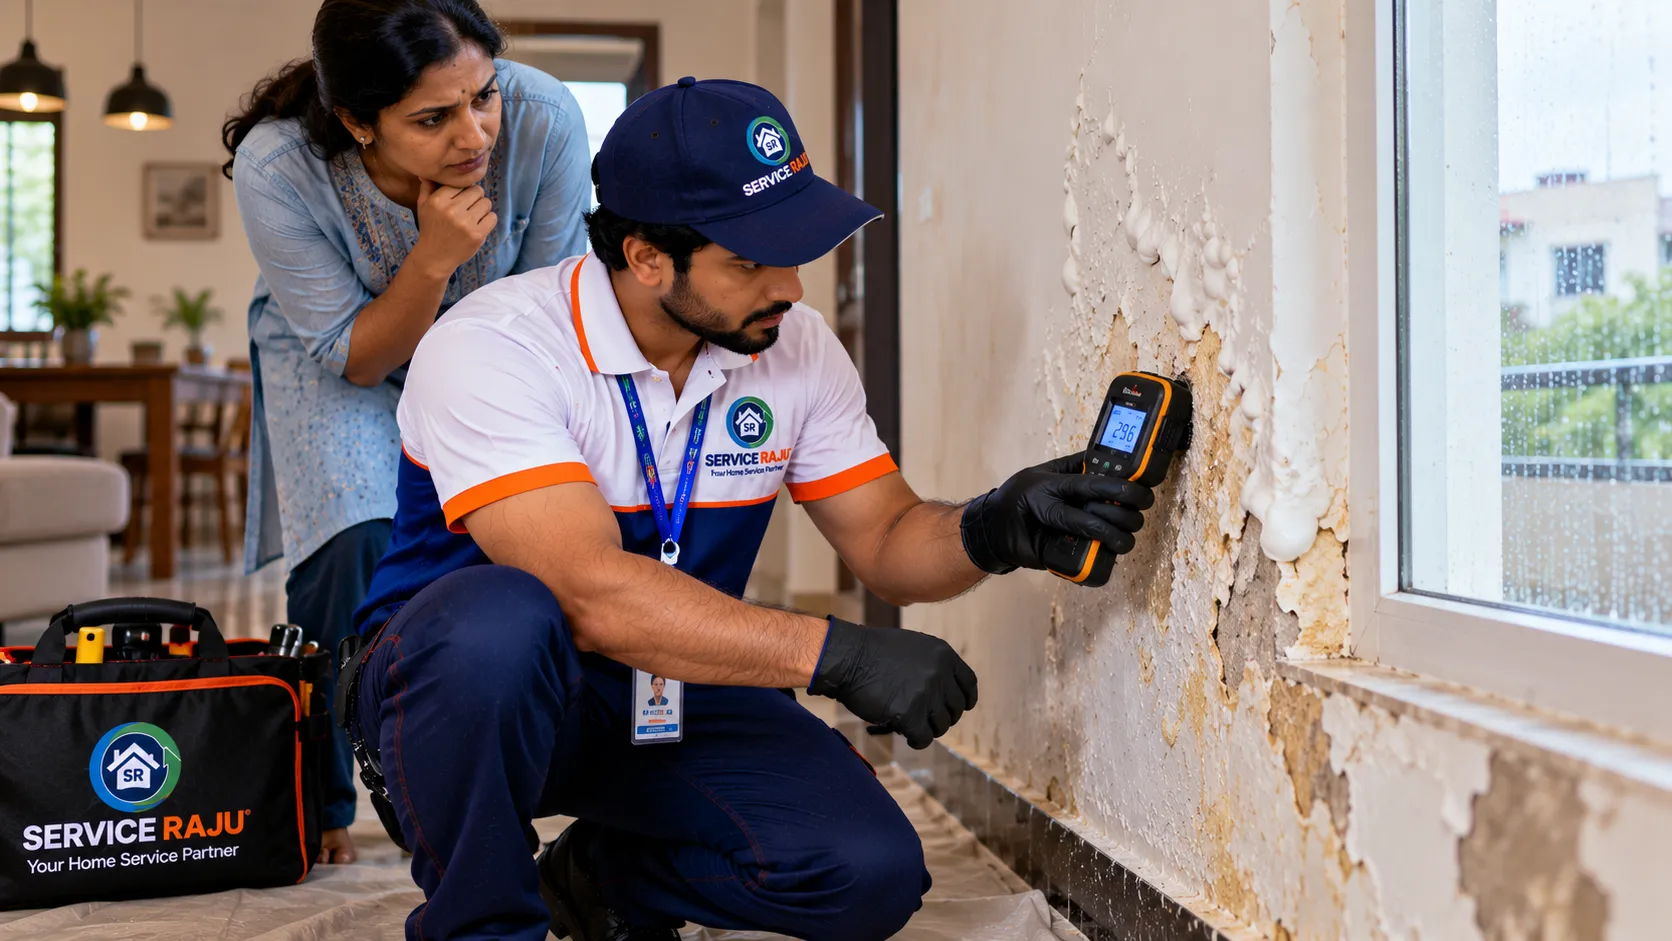
Have you noticed bubbling paint on wall surfaces after rain? Paint that suddenly blisters, forms raised patches, peels or develops soft-looking areas is usually more than a cosmetic problem. In many homes, bubbling paint is a visible sign that moisture has entered or become trapped behind the paint or plaster.
The biggest mistake homeowners make is repainting the damaged area immediately. If the moisture source is still active, a fresh coat of paint may look good temporarily but can bubble, peel or stain again. Effective wall paint bubbling repair Mysore should begin by identifying why moisture is affecting the wall.
The correct sequence is simple:
Identify moisture → find the source → repair the cause → allow the wall to dry → prepare the surface → repaint.
This guide explains seven common causes of bubbling paint and what type of repair may be required.
2. Why Does Wall Paint Bubble After Rain?
Paint bubbling happens when the bond between the coating and the underlying surface becomes weakened. Moisture can enter through cracks, porous masonry, joints, damaged waterproofing, plumbing problems or other pathways.
When water or moisture accumulates behind a coating, it can push against the paint film. Changes in temperature can also contribute to expansion and contraction of trapped moisture and building materials. The result may be small blisters, large bubbles, peeling paint, damp patches or areas where the coating separates from the wall.
Rain can make an existing moisture problem much more visible. If the bubbling becomes worse after rainfall, the wall should be inspected for external water entry as well as concealed plumbing or other moisture sources.
3. 1. Hidden Water Leakage
One of the first possibilities to consider is a concealed plumbing leak.
A water pipe inside a wall may develop a small leak that gradually increases moisture in the surrounding masonry. The water may travel through the wall before appearing as a damp patch or bubbling paint several centimetres or even farther from the actual leak.
This is why the location of the bubbling does not always identify the source.
4. Possible clues include:
- Bubbling that remains even during dry weather
- A damp patch that gradually increases
- Peeling paint around plumbing routes
- Moisture near bathrooms or kitchens
- Recurring dampness after plumbing use
- Unexplained water consumption
If concealed plumbing is suspected, repainting the wall will not solve the problem. A suitable leakage inspection should be considered before major surface repair.
5. 2. Rainwater Seepage Through the Wall
If the bubbling appears mainly after heavy rain, external rainwater seepage should be investigated.
Exterior walls can allow water to enter through cracks, deteriorated coatings, window junctions, parapets, construction joints or other vulnerable areas. Once moisture passes through the exterior surface, it may travel into the masonry and eventually affect interior paint.
This can create a frustrating situation where the inside wall appears damaged even though the actual water-entry point is outside the room.
6. Common areas to inspect include:
- Exterior wall cracks
- Window and frame junctions
- Wall-to-roof connections
- Parapet walls
- Construction joints
- Damaged exterior coatings
- Areas directly exposed to driving rain
In such cases, proper wall seepage repair may require correcting the external water-entry route before restoring the interior paint.
7. 3. Bathroom Moisture and Seepage
A bathroom located next to or above a damaged wall can be another source of moisture.
Water may pass through failed joints, plumbing connections, damaged waterproofing layers or other pathways. The resulting moisture can affect an adjacent bedroom, living room or passage wall.
One important clue is timing. If the bubbling or dampness becomes more noticeable after regular bathroom use, the problem may not be caused by rain alone.
8. Check for:
- Dampness on walls adjoining bathrooms
- Paint damage below wet areas
- Persistent moisture near plumbing lines
- Damaged bathroom joints
- Recurring stains despite repainting
In these situations, the correct solution may involve plumbing diagnosis, bathroom waterproofing or both rather than simply repainting the affected wall.
9. 4. Poor or Failed Waterproofing
Waterproofing is intended to reduce unwanted water penetration through vulnerable building surfaces. When a waterproofing system has deteriorated, been incorrectly installed or was never properly provided in a critical area, moisture can eventually reach interior finishes.
Terraces, roofs, bathrooms, balconies and exterior walls are particularly important areas to consider.
A wall below or adjacent to a terrace can develop dampness when rainwater enters through cracks or damaged waterproofing. Similarly, a poorly protected balcony or exterior wall can transfer moisture toward internal plaster and paint.
If paint bubbling repeatedly follows rainfall, the investigation should consider the entire water path rather than treating only the visible patch.
10. 5. Rising Damp
Moisture can sometimes move upward from lower sections of a building through porous masonry. This type of moisture movement is commonly described as rising damp.
It may be suspected when damage is concentrated toward the lower portion of a wall and gradually extends upward. Paint may blister or peel, plaster may deteriorate and salt-like deposits may appear on the surface.
11. Possible indicators include:
- Damage concentrated near the lower wall
- Persistent dampness
- Flaking or peeling paint
- Powdery or salt-like deposits
- Deteriorating plaster near the floor level
Simply applying another coat of paint can hide the appearance temporarily without addressing the moisture pathway.
A professional assessment should determine whether the moisture is actually rising from below or whether another source is creating the same visual symptoms.
12. 6. Moisture Trapped Under the Paint
Sometimes the moisture problem occurs during or soon after construction, plastering, surface preparation or painting.
If a wall has not dried sufficiently before primer or paint is applied, moisture can become trapped beneath the coating. This may eventually lead to blistering, peeling, discolouration or poor adhesion.
Trapped moisture can also become a problem when a damp surface is sealed with a coating before the underlying moisture has been properly addressed.
13. This can happen when:
- Paint is applied to a damp wall
- Fresh plaster is painted before adequate drying
- Moisture is sealed behind an impermeable coating
- Painting is carried out during unsuitable conditions
- The surface is not properly assessed before painting
Before applying new paint, the wall should be sufficiently dry and suitable for the selected coating system.
14. 7. Incorrect Surface Preparation
Not every bubbling paint problem is caused by an active leak.
Poor surface preparation can also contribute to coating failure. Dust, loose old paint, powdery surfaces, contamination, incompatible coatings or inadequate priming can reduce adhesion between the wall and the new paint layer.
If the underlying surface is weak, painting over it can produce another cycle of blistering and peeling.
15. Good surface preparation may require:
- Removing loose and damaged paint
- Removing weak or deteriorated surface material
- Cleaning the substrate
- Allowing moisture to reduce to an appropriate level
- Repairing cracks where necessary
- Using a suitable primer
- Applying the correct finishing system
This is why peeling paint repair should not be treated as a simple paint-touch-up job when moisture damage is present.
16. How to Find the Actual Cause of Bubbling Paint
The most important part of the repair is diagnosis.
A visible bubble tells you that the wall finish has been affected. It does not automatically tell you where the moisture came from.
A useful inspection can begin with:
- Mapping the affected area.
- Checking whether the damage changes after rainfall.
- Inspecting nearby bathrooms and plumbing lines.
- Checking the exterior side of the affected wall.
- Looking for cracks, joints and water-entry points.
- Checking lower-wall moisture patterns.
- Assessing the condition of existing paint and plaster.
- Using moisture measurement where appropriate.
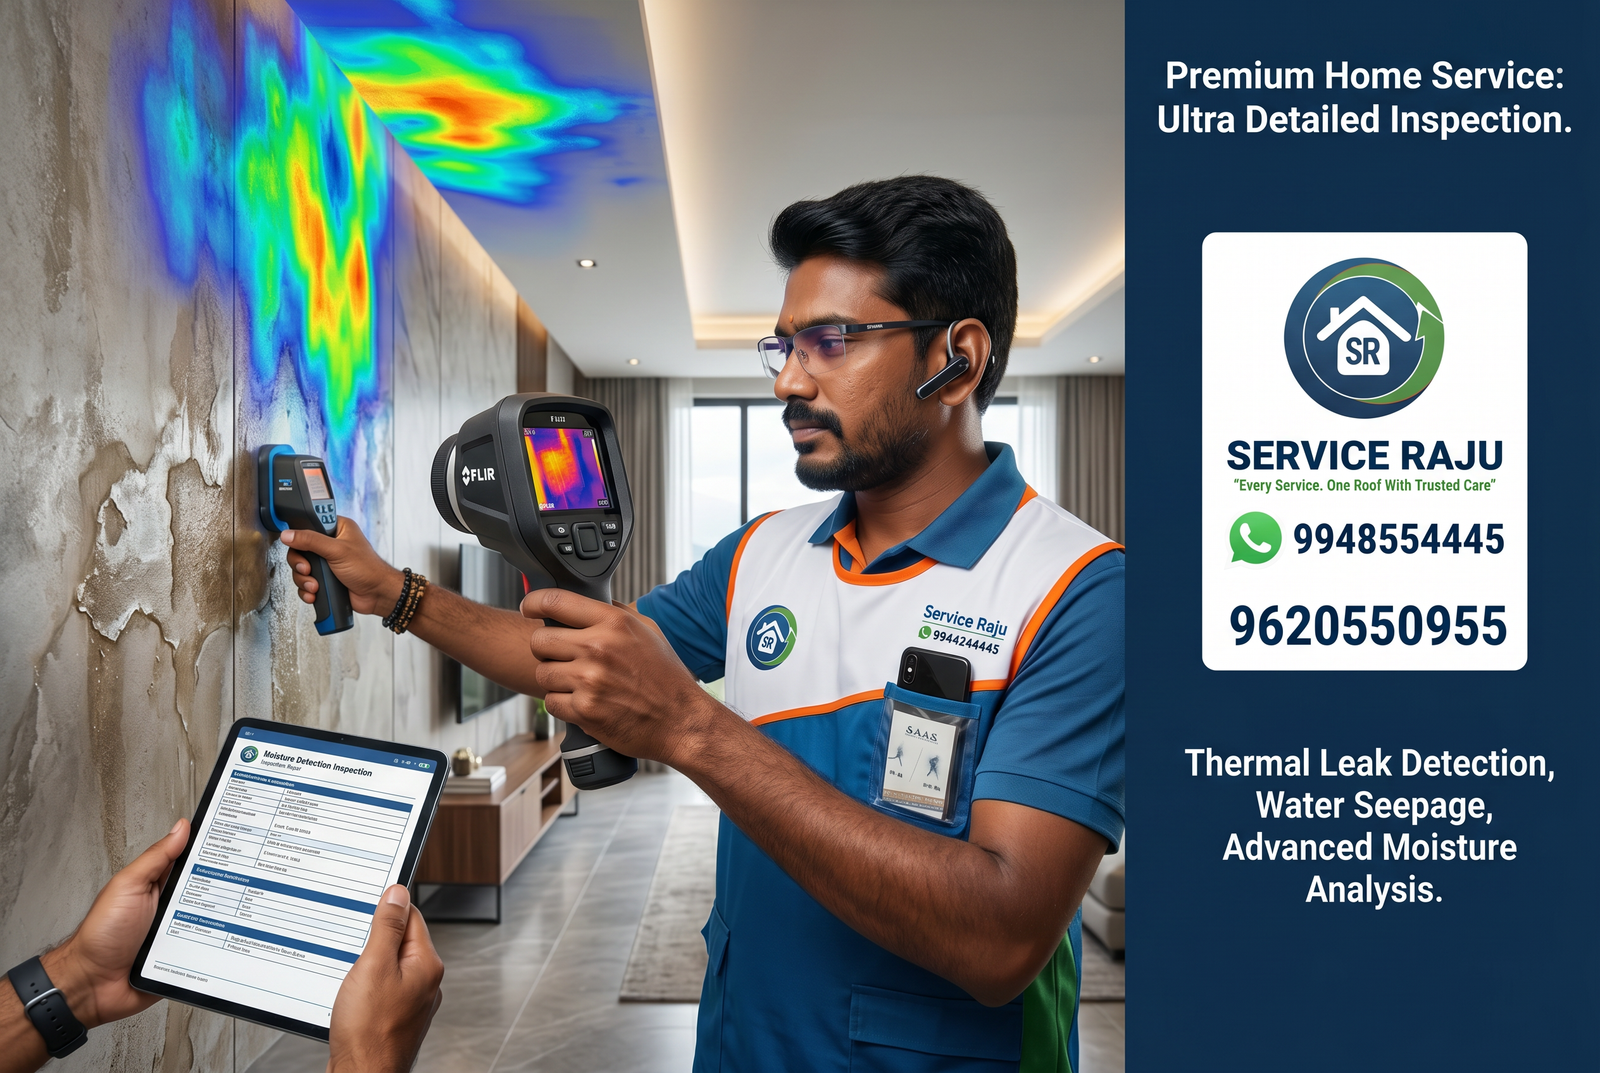
- Using thermal imaging when the suspected moisture source is concealed and the conditions are suitable for thermal inspection.
Moisture meters and thermal imaging can provide useful diagnostic information, but neither method should be treated as a magic test that automatically identifies every leak. The technician needs to interpret the readings together with the building layout, plumbing arrangement, weather conditions and visible symptoms.
17. The Right Repair Process
For long-lasting wall dampness repair Mysore, the repair sequence matters.
18. Step 1: Inspect the damaged wall
Document where the paint is bubbling, peeling or discoloured. Look for patterns rather than treating every damaged area independently.
19. Step 2: Identify the moisture source
Determine whether the likely cause is plumbing leakage, rainwater seepage, bathroom moisture, terrace waterproofing failure, rising damp or trapped construction moisture.
20. Step 3: Repair the source
Correct the plumbing leak, seal the water-entry point, repair waterproofing or address the relevant moisture pathway.
21. Step 4: Allow the wall to dry
The damaged wall should be allowed to reach an appropriate drying condition before restoration. The required drying period depends on the construction material, moisture level, ventilation, weather and extent of damage.
22. Step 5: Remove failed paint
Loose, blistered and poorly bonded paint should be removed. Damaged plaster may also require repair if its condition has deteriorated.
23. Step 6: Prepare the surface
The surface should be cleaned, repaired and appropriately primed before the final coating system is applied.
24. Step 7: Repaint
Once the underlying problem has been corrected and the substrate is ready, suitable paint can be applied according to the manufacturer's preparation and application requirements.
The key principle is: repair the moisture source first and restore the paint second.
25. Why You Should Not Repaint First
Repainting a bubbling wall without finding the moisture source can create a short-term cosmetic improvement but leave the underlying problem untouched.
For example, if rainwater continues entering through an exterior crack, a newly painted interior wall may begin bubbling again during the next period of heavy rainfall.
Similarly, if a concealed plumbing leak is still active, the paint may continue to deteriorate regardless of how many coats are applied.
Repeated repainting can therefore become more expensive than diagnosing the cause at the beginning.
A better approach is:
Don't repaint first → inspect moisture → identify source → repair → dry → prepare → repaint.
26. Warning Signs That Need Inspection
Book an inspection if you notice any of the following:
- Paint bubbles appearing after rainfall
- Paint repeatedly peeling from the same area
- Brown or yellow water stains
- Dark damp patches
- Musty smell near the damaged wall
- Cracks around windows or exterior walls
- Powdery deposits on the wall
- Dampness around bathroom-adjoining walls
- Damage returning soon after repainting
- Plaster becoming soft or loose
The sooner the source is identified, the easier it may be to prevent additional damage to paint, plaster and other finishes.
27. How to Prevent Paint Bubbling After Rain
Preventive maintenance can reduce the chance of recurring moisture damage.
- Inspect exterior walls before the rainy season.
- Repair visible cracks before they allow water penetration.
- Check window edges and external joints.
- Keep terrace drainage paths clear.
- Inspect terrace and roof waterproofing periodically.
- Repair leaking plumbing promptly.
- Check bathroom walls adjoining bedrooms and living spaces.
- Do not paint over visibly damp surfaces.
- Allow fresh plaster to dry adequately before painting.
- Use appropriate primers and coating systems for the substrate.
- Investigate recurring bubbling instead of repeatedly touching up the paint.
28. When to Book Professional Wall Moisture Inspection
Professional inspection becomes especially useful when the source of the moisture is not obvious.
Consider booking an inspection when:
- The bubbling appears repeatedly after rain.
- The damaged area is far from an obvious water source.
- The wall shares a boundary with a bathroom.
- There is suspected concealed plumbing leakage.
- Waterproofing has already been attempted but the problem returned.
- Paint continues peeling despite repainting.
- The wall shows extensive dampness or plaster deterioration.
Depending on the situation, inspection may involve visual assessment, moisture measurement, plumbing investigation, thermal imaging or other appropriate diagnostic methods.
Service Raju's existing leakage-detection service framework includes moisture assessment, thermal leak scanning and non-destructive diagnosis where appropriate. :chatgpt-content-referenceindex="0"
29. Wall Dampness and Paint Repair in Mysore
If your wall paint starts bubbling after rain, don't assume that another coat of paint will solve the problem.
Service Raju can help homeowners investigate the moisture problem before proceeding with the appropriate repair. Depending on the findings, the solution may involve leakage detection, plumbing repair, wall seepage repair, waterproofing, surface preparation or repainting.
The practical workflow is:
Book inspection → assess moisture → identify likely source → recommend repair → correct the moisture problem → restore the damaged surface.
For concealed moisture concerns, Service Raju provides water leakage detection and diagnostic services, including moisture assessment and thermal inspection where appropriate. :chatgpt-content-referenceindex="1"
Ready to find out why your wall paint is bubbling?
Book a Wall Moisture Inspection with Service Raju.
Call: +91 9964544445
Trusted Home Services in Mysuru, Udupi, Mangaluru & Indore.
30. Frequently Asked Questions
31. Why does my wall paint bubble after rain?
Rain can expose or worsen moisture entering through exterior walls, cracks, joints, windows, terraces or other vulnerable areas. The moisture can weaken the bond between paint and the underlying surface, causing blistering or peeling.
32. Can I simply repaint bubbling paint?
Repainting is usually not the first step when moisture is suspected. The moisture source should be identified and corrected, the affected surface allowed to dry and the damaged coating properly removed before repainting.
33. Does bubbling paint always mean a water leak?
No. Bubbling can also result from trapped moisture, poor surface preparation, coating incompatibility or inadequate drying. However, recurring bubbling after rain is a strong reason to investigate moisture entry.
34. How can I tell if rainwater is causing the wall damage?
If the bubbling or dampness becomes noticeably worse after rainfall, inspect the exterior wall, window junctions, terrace, roof, parapets and other exposed areas. The timing is a useful clue, but it does not by itself prove the exact source.
35. Can a thermal camera find dampness behind a wall?
Thermal imaging can identify temperature patterns that may be associated with moisture under suitable conditions. It should be interpreted together with visual inspection and other diagnostic information rather than treated as a standalone guarantee.
36. How long should I wait before repainting a damp wall?
There is no single drying period suitable for every wall. Drying depends on the material, moisture level, ventilation, weather and the extent of water damage. The surface should be appropriately dry before restoration work begins.
37. Should I repair the wall or waterproof it?
That depends on the source. A plumbing leak may require plumbing repair, while rainwater entering through an exterior wall or terrace may require waterproofing. Diagnosis should come before selecting the repair method.
38. Does peeling paint mean the entire wall needs repainting?
Not necessarily. The affected area, condition of the underlying plaster, extent of moisture damage and surrounding paint adhesion should be assessed before deciding the scope of repainting.
 AC Repair
.webp) Ant Control Service
Ant Control Service
 Basin & Sink Services
.webp) Bath & Shower Services
Bath & Shower Services
.webp) Bath Fittings & Mirrors
Bath Fittings & Mirrors
 Bathroom Cleaning Service
 Bathroom Renovation Services
 Bed Bug Control Services
 Bedroom Painting
 Book a Carpenter Consultation
 Book Electrical Consulting
.webp) Cabinet Painting & Wood Refinishing
Cabinet Painting & Wood Refinishing
 Chimney Cleaning
 Civil Masonry Work
 Clean-Up Services
.webp) Clothes Hanger Installation
Clothes Hanger Installation
 Cockroach Control Services
---mysore-mysore-standard-300x200.webp) Commercial Cleaning
Commercial Cleaning
 Commercial Pest Control AMC Service
 Cupboard & Drawer Services
 Decorative Wall Panels
 Deep Sanitisation Service
 Detan & Bleach
 Door, Grill & Cabinet Painting Service
.webp) Doorbell & security
Doorbell & security
 Drain Blockage Clearing
 Electrical Appliance Services
 Electrical Wiring Services
 Empty Home Deep Cleaning
.webp) Fabrication
Fabrication
 Facials
.webp) Fan Installation & Repair
Fan Installation & Repair
 Full Home Cleaning Service
 Full Home Renovation
 Furniture Repair Service
 Gas Stove & Hob Repair
.webp) General Pest Control Services
General Pest Control Services
 General Plumbing & Consultation
 Geyser Repair
 Glass Cleaning
 Head Massage
.webp) Honeybee & Wasp-Services
Honeybee & Wasp-Services
 Kitchen & Bathroom Painting Service
 Kitchen Cleaning
 Kitchen Fittings
.webp) Kitchen Renovation
Kitchen Renovation
.webp) Laptop/Desktop service
Laptop/Desktop service
 Leak Detection and Repair
 LED TV Repair
 Living and Dining Room Painting
 Makeup, Saree & Styling
 Manicure & Pedicure
 MCB,Meter & Fuse Services
 Microwave Repair
 Mosquito Pest Control Service
 Multi-Room Painting Service
 Painting Consultation
 Quick Mini Cleaning Services
 Refrigerator Repair
 RO Water Purifier
.webp) Rodent Control Services (Rat & Mice Treatment)
Rodent Control Services (Rat & Mice Treatment)
.webp) Rooms Cleaning
Rooms Cleaning
 Shelves & Decor
 Sofa, Carpet & Mattress Cleaning
 Solar Water Heater Service
 Sump & Tank Cleaning
 Switch & Socket Services
 Tap & Mixer Service
.webp) Termite-Control-Services
Termite-Control-Services
 Threading & Face Wax
.webp) Tile & Granite Installation & Polishing
Tile & Granite Installation & Polishing
 Toilet & Commode Services
.webp) UPS and Inverter Repair Services
UPS and Inverter Repair Services
.webp) Wall Painting Service
Wall Painting Service
 Washing Machine Repair
 Water Level Controllers
 Water Tank and Pump Repair
 Waterproofing
 Waterproofing Services
 Waxing
 Window & Curtain Services
 Wooden Door Services